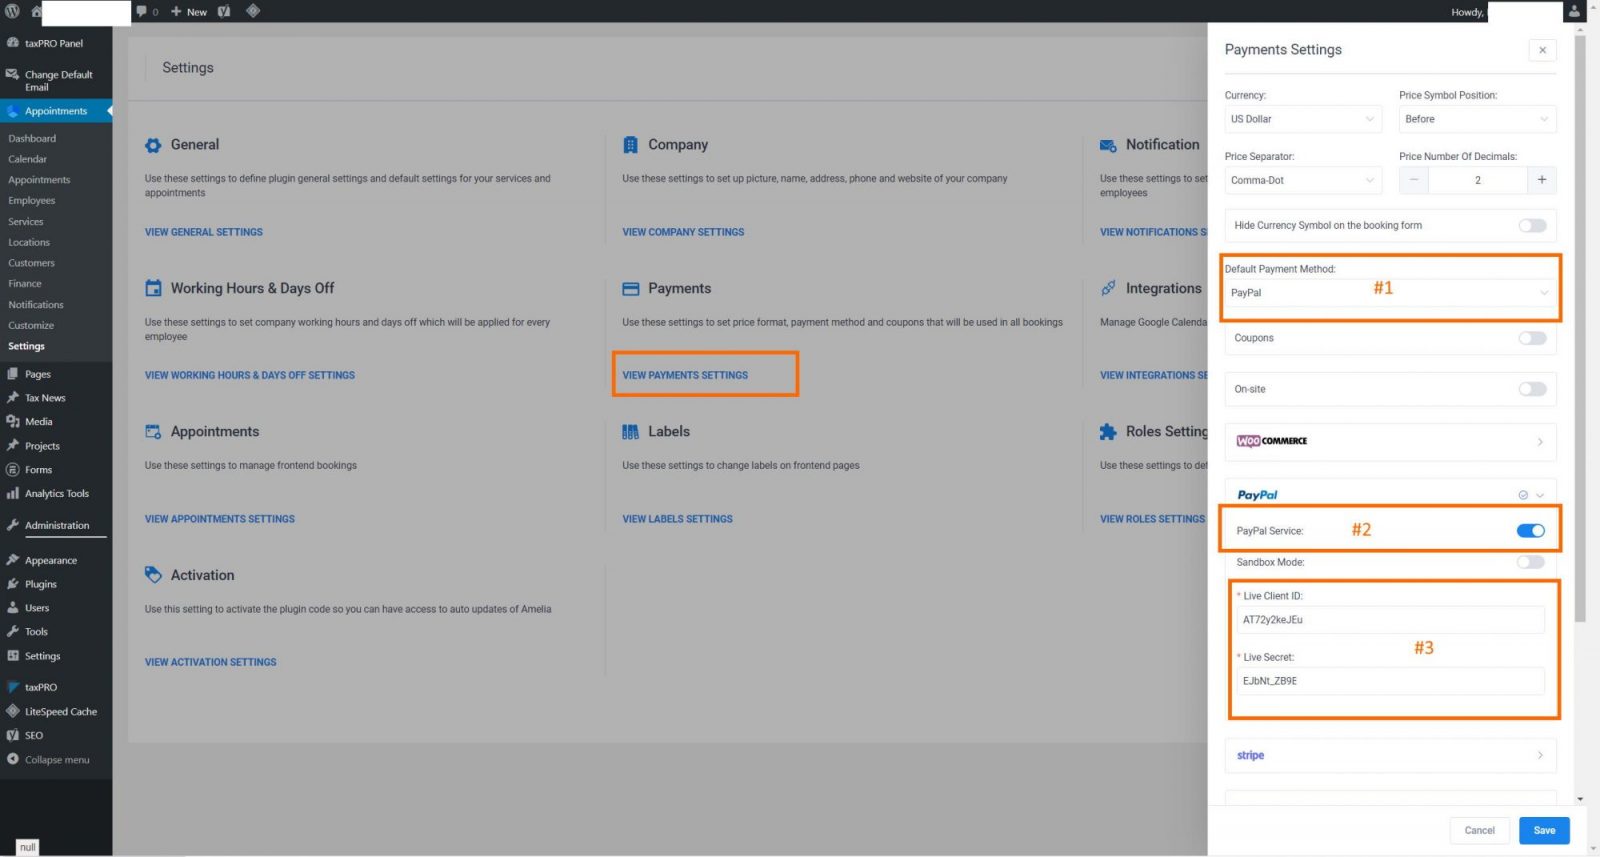
This option allows your customers to pay appointments directly with PayPal (debit/credit card or PayPal balance). First, you need to enable the “PayPal Service”.
You will need to set your PayPal Connection settings. Simply follow the next steps:
- Go to https://developer.paypal.com/developer/accountStatus/ and login with your PayPal account.
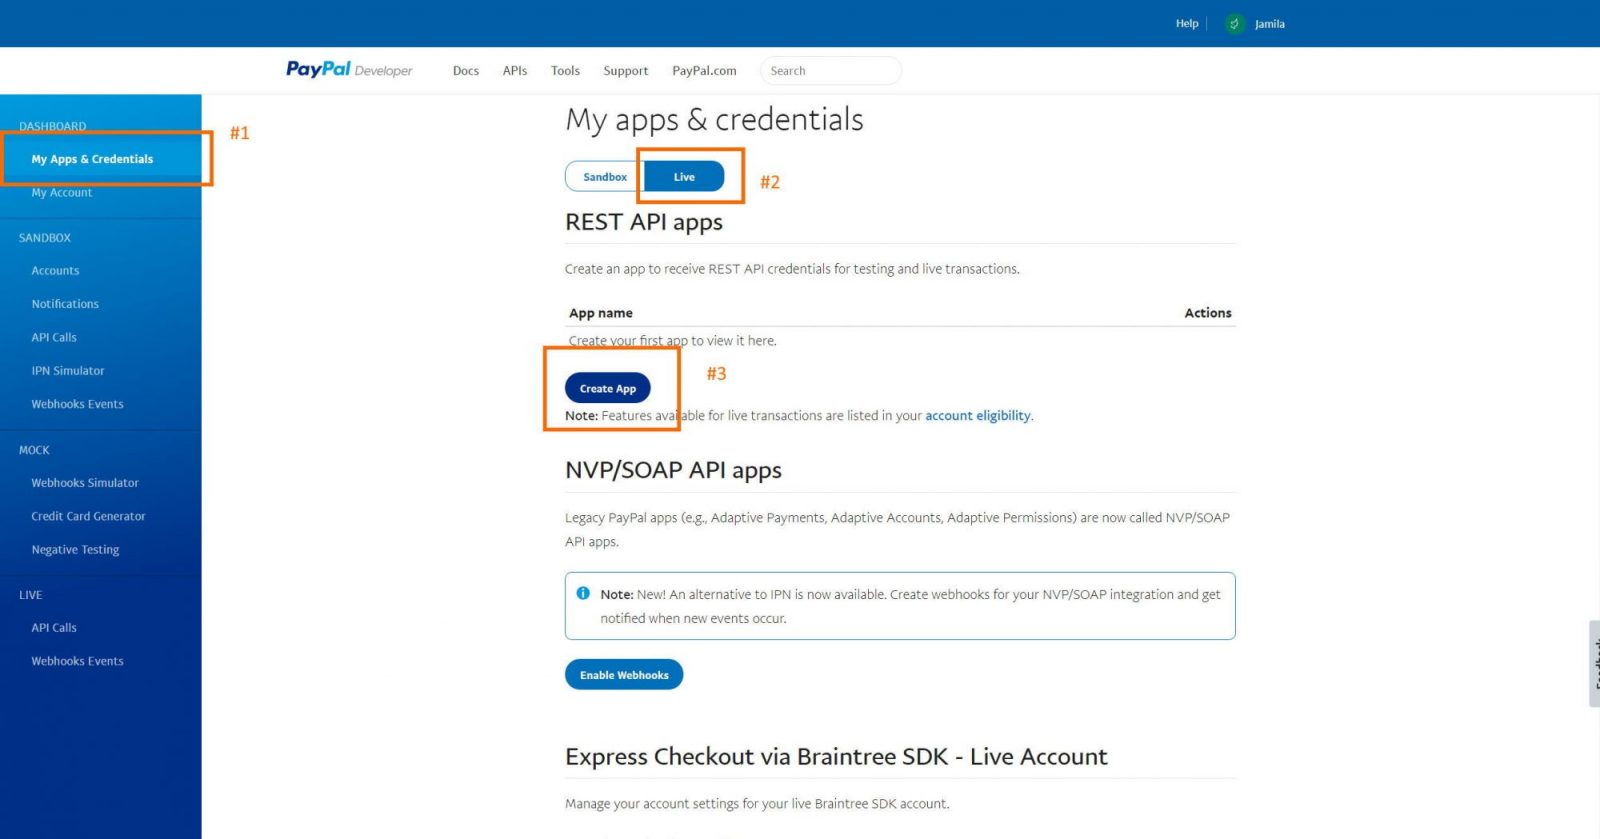
- On the left in the “Dashboard” menu click on “My Apps & Credentials” (#1).
- Now you will see a screen that has the words “Sandbox | Live” (#2). Click this to make it LIVE (Note: If at this point it asks you to “upgrade your account”, you must do this to accept payments on your site before you can continue. Scheduler requires a Business Account.)
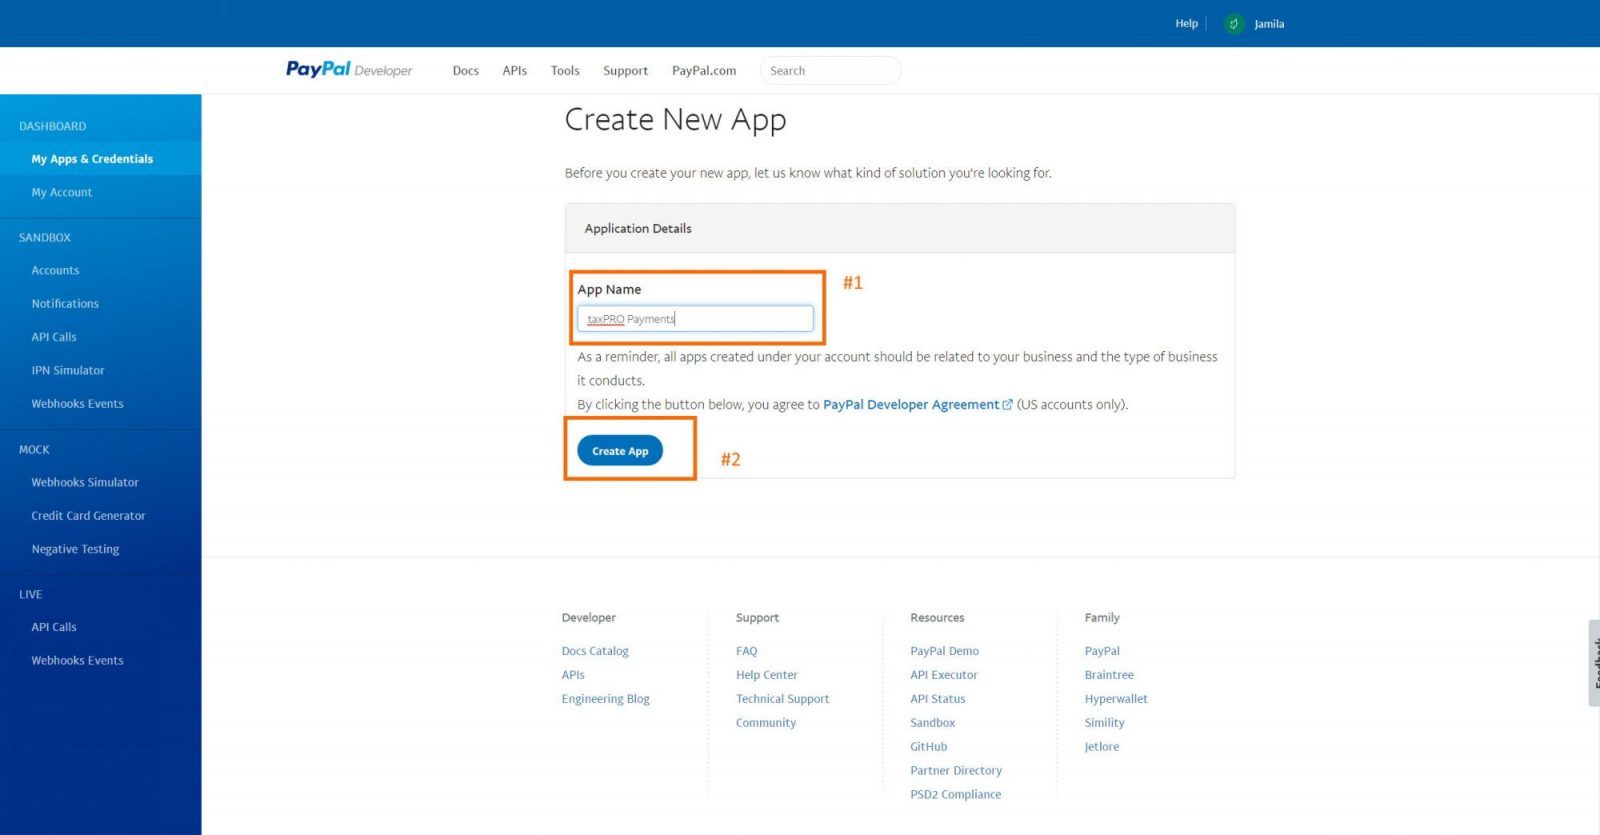
- Scroll down. In the “REST API apps” section you need to “Create App”(#3). (We suggest naming the App “Business Name App” (So, if you are Joes Taxes, name it “Joes Taxes App”)
Setup PayPal in your scheduler
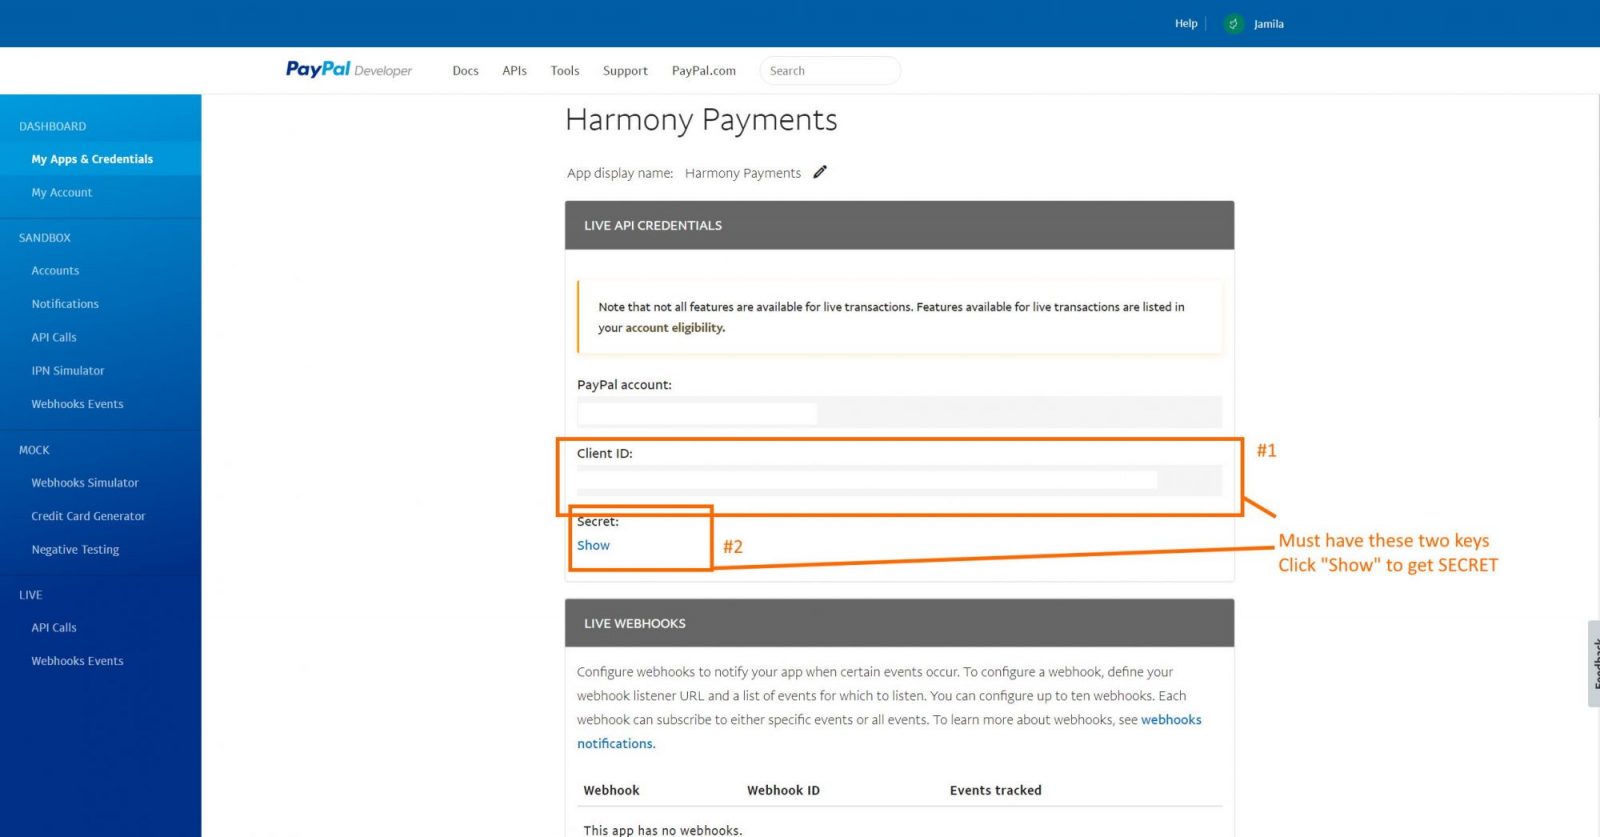
- You must copy data from the field “Client ID”(#1) and click “Show”(#2) under secret. Copy both of these to a safe place.
2. Login to your website now. Hold your mouse over “Appointments”. Click on SETTINGS.
Now, follow the guides in the image below.
#1. Turn on PayPal
#2. Enable PayPal Service
#3. Paste in your Client ID and Secret
Save. Now you can go to “Services” and add a price to your available service options.