
Many of the services today are provided completely online, and like that require a place where online meetings can be hold. Integration with Zoom, the leader in modern enterprise video communication, is made to allow you to schedule and maintain those meetings online through audio, chat, and/or video call.
Setting up your Zoom application
- Sign up or Sign in to Zoom – if this is your first time using Zoom you will need to Sign up by entering your email. After you have entered the email you will receive an email from Zoom to confirm your address and finish the process. Open the email and follow the link that Zoom has sent you, set up your password, and skip steps with adding new members for now. After that, you will be redirected to your Zoom Profile.
- Visit Zoom App Marketplace – Enter https://marketplace.zoom.us/ in your browser to visit Zoom App Marketplace. Once you enter the page click Sign In and sign in with the account that you have previously created on Zoom.
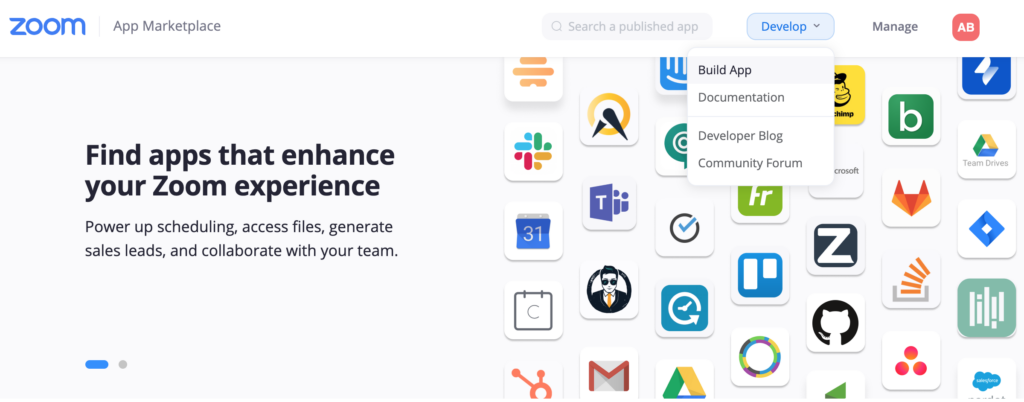
- Create your App – Once you have entered the marketplace click on Develop button and choose the Build App option.
- Choose your App type – On this page, you need to choose the first option JWT. Click “Create” and you will see a popup to give your App a name. Enter the name and click “Create” once again.
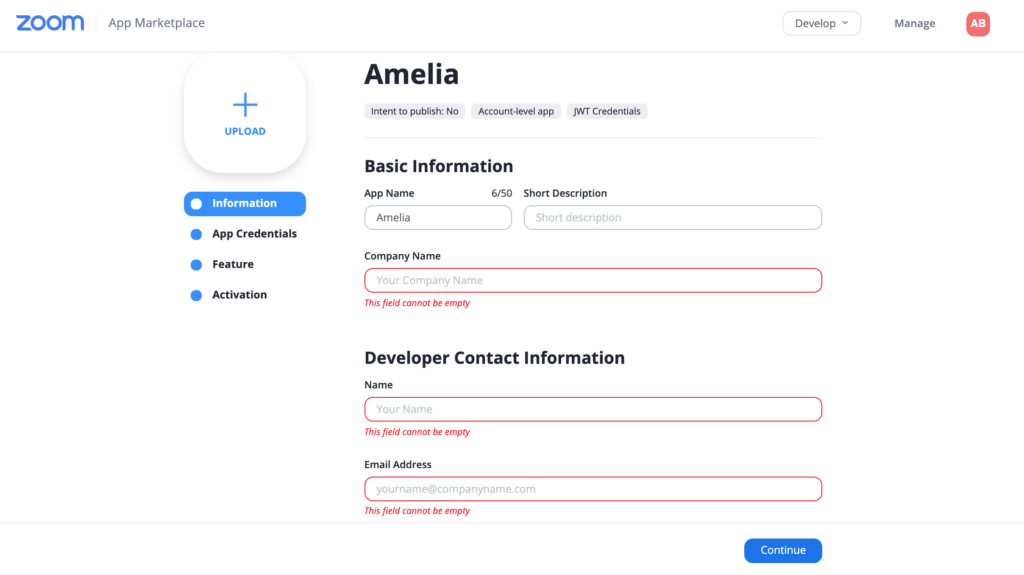
- Basic Information – Once you have added a name to your app you will be redirected to the Information page. Here we will enter just three mandatory information, you can add the rest later if you want since the rest fields are optional. In Basic Information add Company Name, and in Developer Contact Information add Name and Email address and click “Continue”.
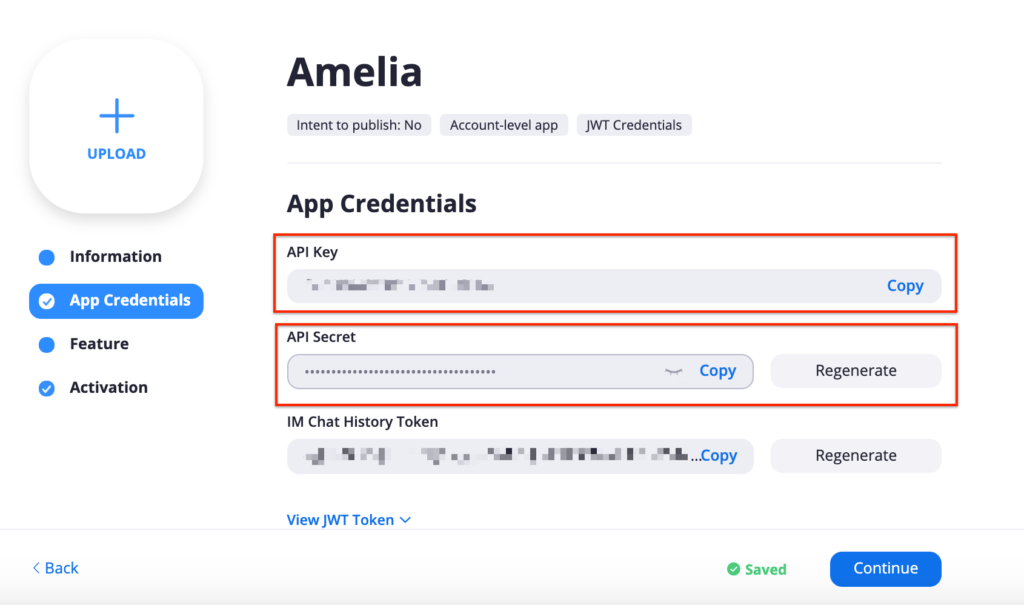
- App Credentials – Once you have entered Basic Information the App Credentials will open. You need to paste this information to Amelia (Appointment Scheduler) Settings in order to connect Amelia (Appointment Scheduler) plugin with your Zoom app. Click “Copy” in the “API Key” field and open Amelia (Appointment Scheduler) Settings. On the “Settings Page” you will see “Integration Settings”, open it and choose “Zoom” (the second tab). Paste “API Key” from Zoom to the “Client Key” option in our Zoom Settings. Then go back to your Zoom App, copy the “API Secret” and paste it to the “Client Secret” option in our Zoom Settings. Now click “Save” in the bottom right corner of Zoom Settings in the Amelia (Appointment Scheduler) plugin and our plugin and your Zoom application will be connected.
Zoom Settings
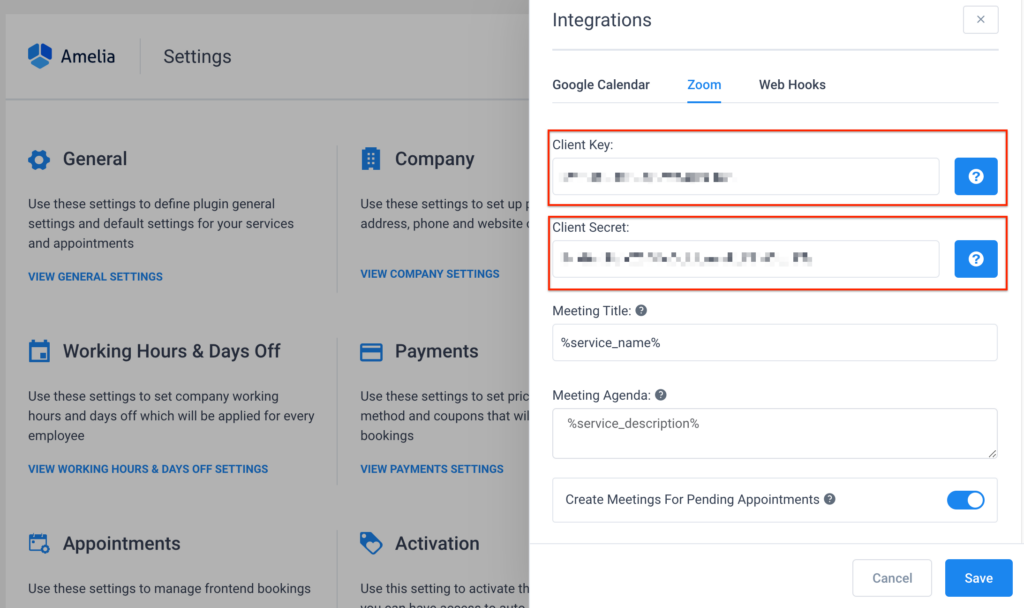
Besides the “Client Key” and “Client Secret” in Zoom Settings you will see three other options to set:
- Meeting Title – You can set here what you want your meeting title to be. In order to have a different meeting title each time that matches your meeting add the placeholder from the email notifications page. Go to the Notifications page, open the “Show Email Placeholders” option and copy the placeholder that you want and then paste it in this field (for example %service_name% like we’ve used on the picture above).
- Meeting Agenda – Works the same as the option above. Copy one or multiple placeholders from the notifications page and paste it here in order to show details that match the scheduled appointments or events (we have chosen %service_description% for this field).
- Create Meetings For Pending Appointments – Here you can choose whether you want your meetings to be created for Pending appointments as well or not. By default, this option is disabled which means that meetings will be created only for the appointments with Approved status.
Once you have set these three options click “Save” and you will be one step closer to using Zoom with Amelia (Appointment Scheduler).
Connecting employees with Zoom host


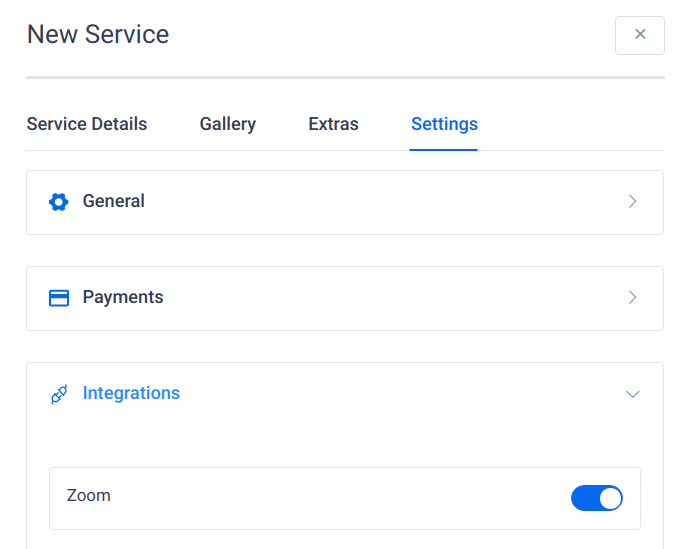
Services and Zoom
Setting up notifications with Zoom link
- %zoom_host_url% – this is the placeholder that you need to paste to employees’ appointment notifications.
- %zoom_join_url% – this is the placeholder that you need to paste to customers’ appointment notifications.
For events, once you click on one of the event booking notifications you will see four different placeholders at the bottom of the list:
- %zoom_host_url_date% – this is the placeholder that you need to paste in employees’ event notifications if you want to show the URL with the date.
- %zoom_host_url_date_time% – this is the placeholder that you need to paste in employees’ event notifications if you want to show the URL with date and time
- %zoom_join_url_date% – this is the placeholder that you need to paste in customers’ event notifications if you want to show the URL with the date.
- %zoom_join_url_date_time% – this is the placeholder that you need to paste in customers’ event notifications if you want to show the URL with date and time.
Zoom placeholders are already being forwarded as Hyperlinks, so don’t add them behind any text. If you do, the URLs will not be forwarded, and your customers and employees won’t be able to access the meeting from the email.
Finding your link to the Zoom meeting
If you are looking like an employee/admin or manager user in Amelia (Appointment Scheduler) for the appointment you will find a link once you click on the appointment in the appointments list or if you click on the “Edit” appointment option and then open the Zoom tab. You will see two links there, one for the host and one for the participant, so if you need to send a link to the customer again you can send them a link for the participants. If, on the other hand, you are looking for the link in events, open the Event page, click “Edit” Event and you will see both links right away below the date and time settings.
